CloudFlare Zero Trust, or how I ditched basic auth

I was looking for an easy and modern replacement to my Nginx basic auth.
My main usage of basic auth was:
- adding a layer of authentication on top of a service without login
- adding a second layer of authentication on top of a service with login
I wanted something easy to maintain, more close to a standard 2fa with rolling one time code or SSO and without any dependency on any software running in my deployments.
Using CloudFlare for almost every public endpoint I am maintaining, it was a no brainer to use their zero trust solution.

Step 0: first access
The only requirement: your domain needs to be hosted by Cloudflare.
In your Cloudflare dashboard, go to "Zero Trust" section.
When you access Zero Trust for the first time, you'll be asked to choose your "team name". This name will be used as a subdomain for authentication. It will look like this: https://teamname.cloudflareaccess.com.
Choose the plan "Zero Trust free". It's 0$ but you will still be asked to add a payment method.
Step 1: login methods
This guide is focused on authentication with email OTP, but there's a bunch of authentication providers available that you can enable to do SSO.
For example, I'm using a Github integration and it's great. The official guide explain step by step how to configure each identity provider.
If you want to use a specific login method, go to "Settings" and "authentication". Under "Login methods", click "Add new". Enable "One-time PIN" if it's not already the case.

Step 2: create a new application
Under "Access", go to "Application" and create a new application.

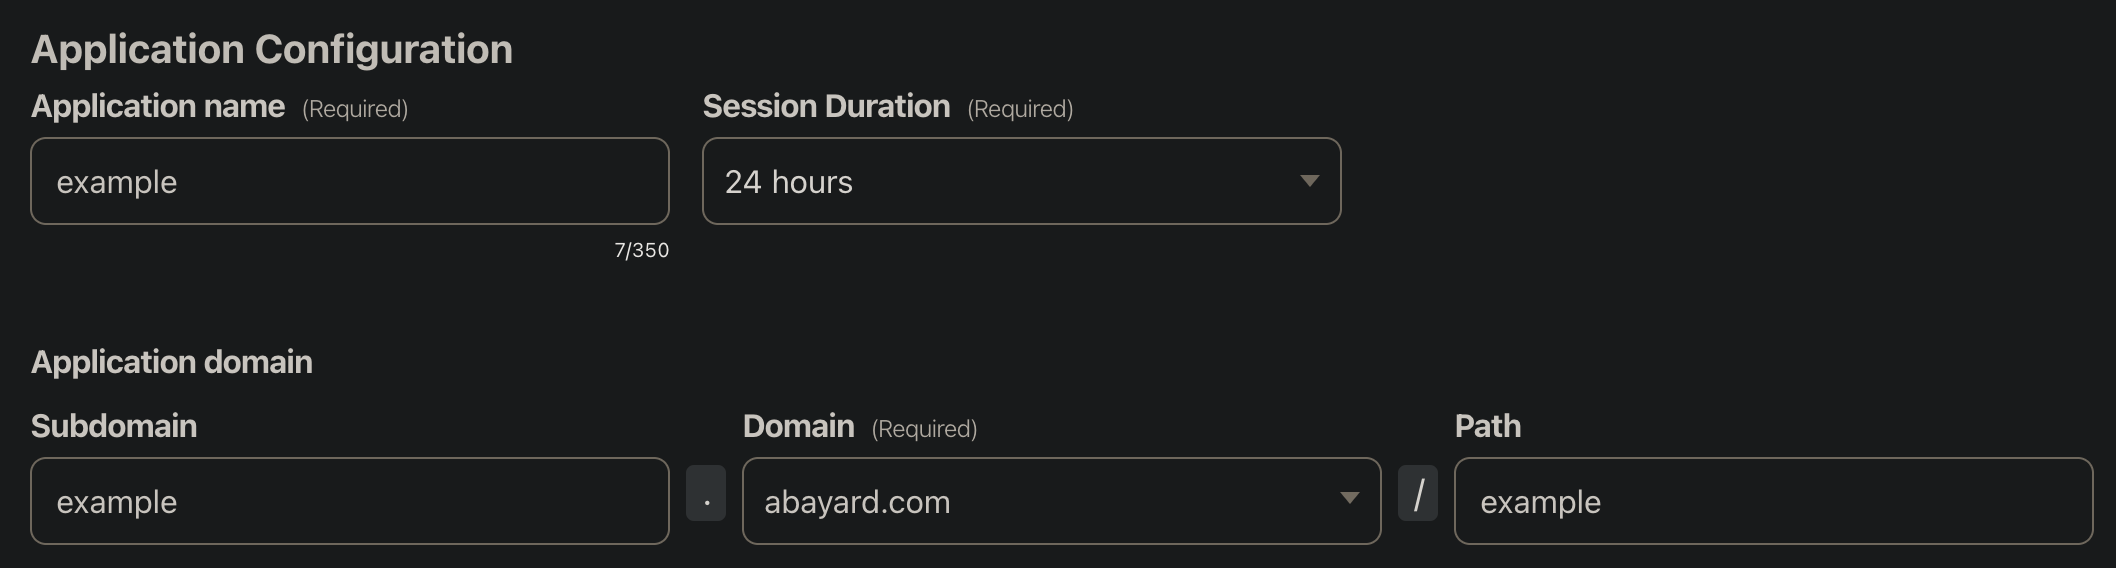
Step 3: configuration
Select "Self Hosted". Now you can start configuring it: choose a name and a session duration. Select the domain where it will be applied and the subdomain if needed. If you want to only enable it for a specific URL, add the path.
You can pretty much keep everything else on the default settings.
If you have multiple app with multiple identity provider and you want to restrict one with specific providers, disable "Accept all available identity providers" and select the one you want to enable.
If you only have a single identity provider, you can enable "Instant Auth", which will disable the identity provider selection.
Step 4: policy
Now you need to create a new policy and configure the rules.
The "Action" will be "Allow".
Let's say you want to use a one time code to authenticate, you will need the following configuration:
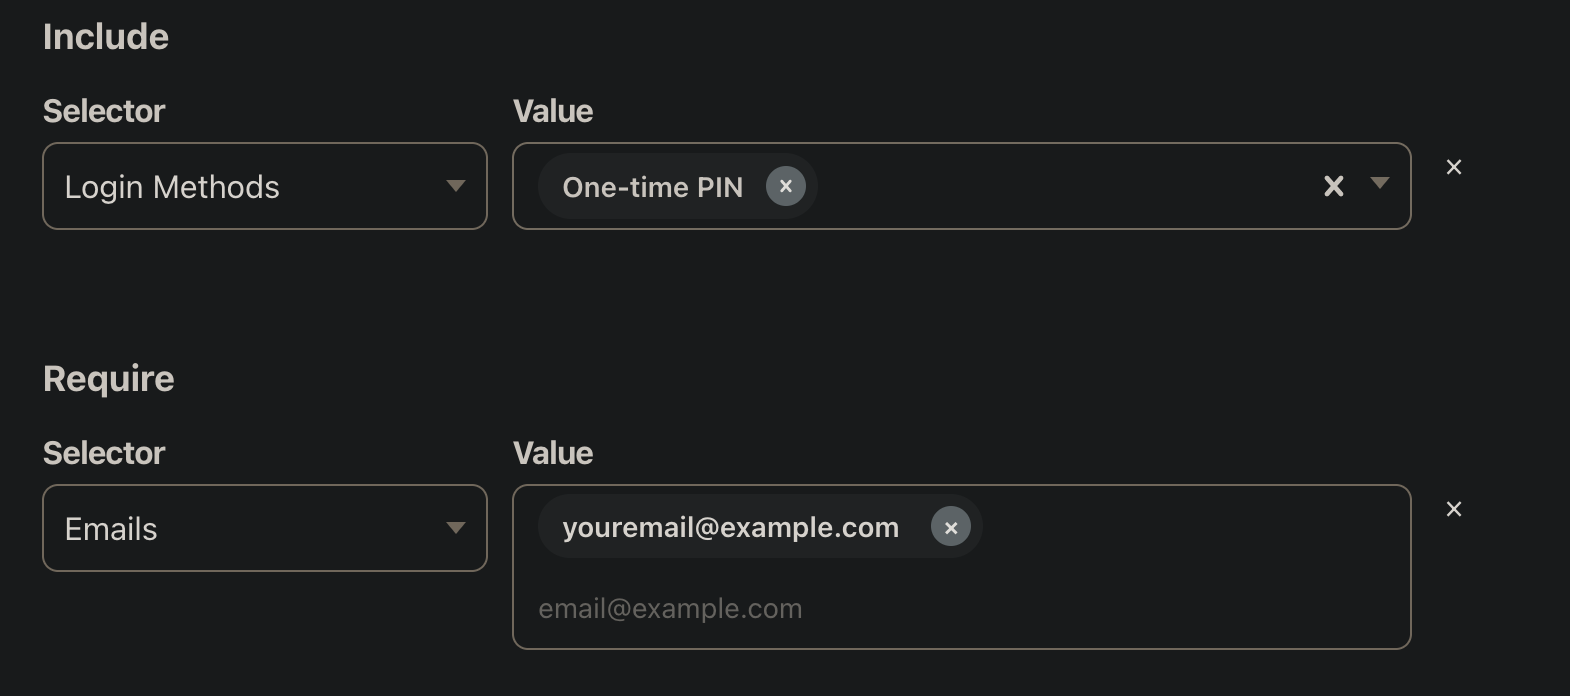
You can also use any Login Methods you want, you just need to adapt the policy.
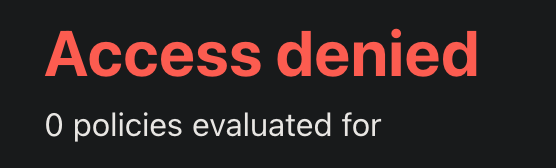
Step 5: test the policy
To be sure your policy will be applied properly, it's a good idea to test it.
Go to your application and "Policy" tab, then click on "Test your policies".
If your user is allowed to connect, you will see that the access was granted.
If you test with an user not allowed to access the application, it should be rejected.
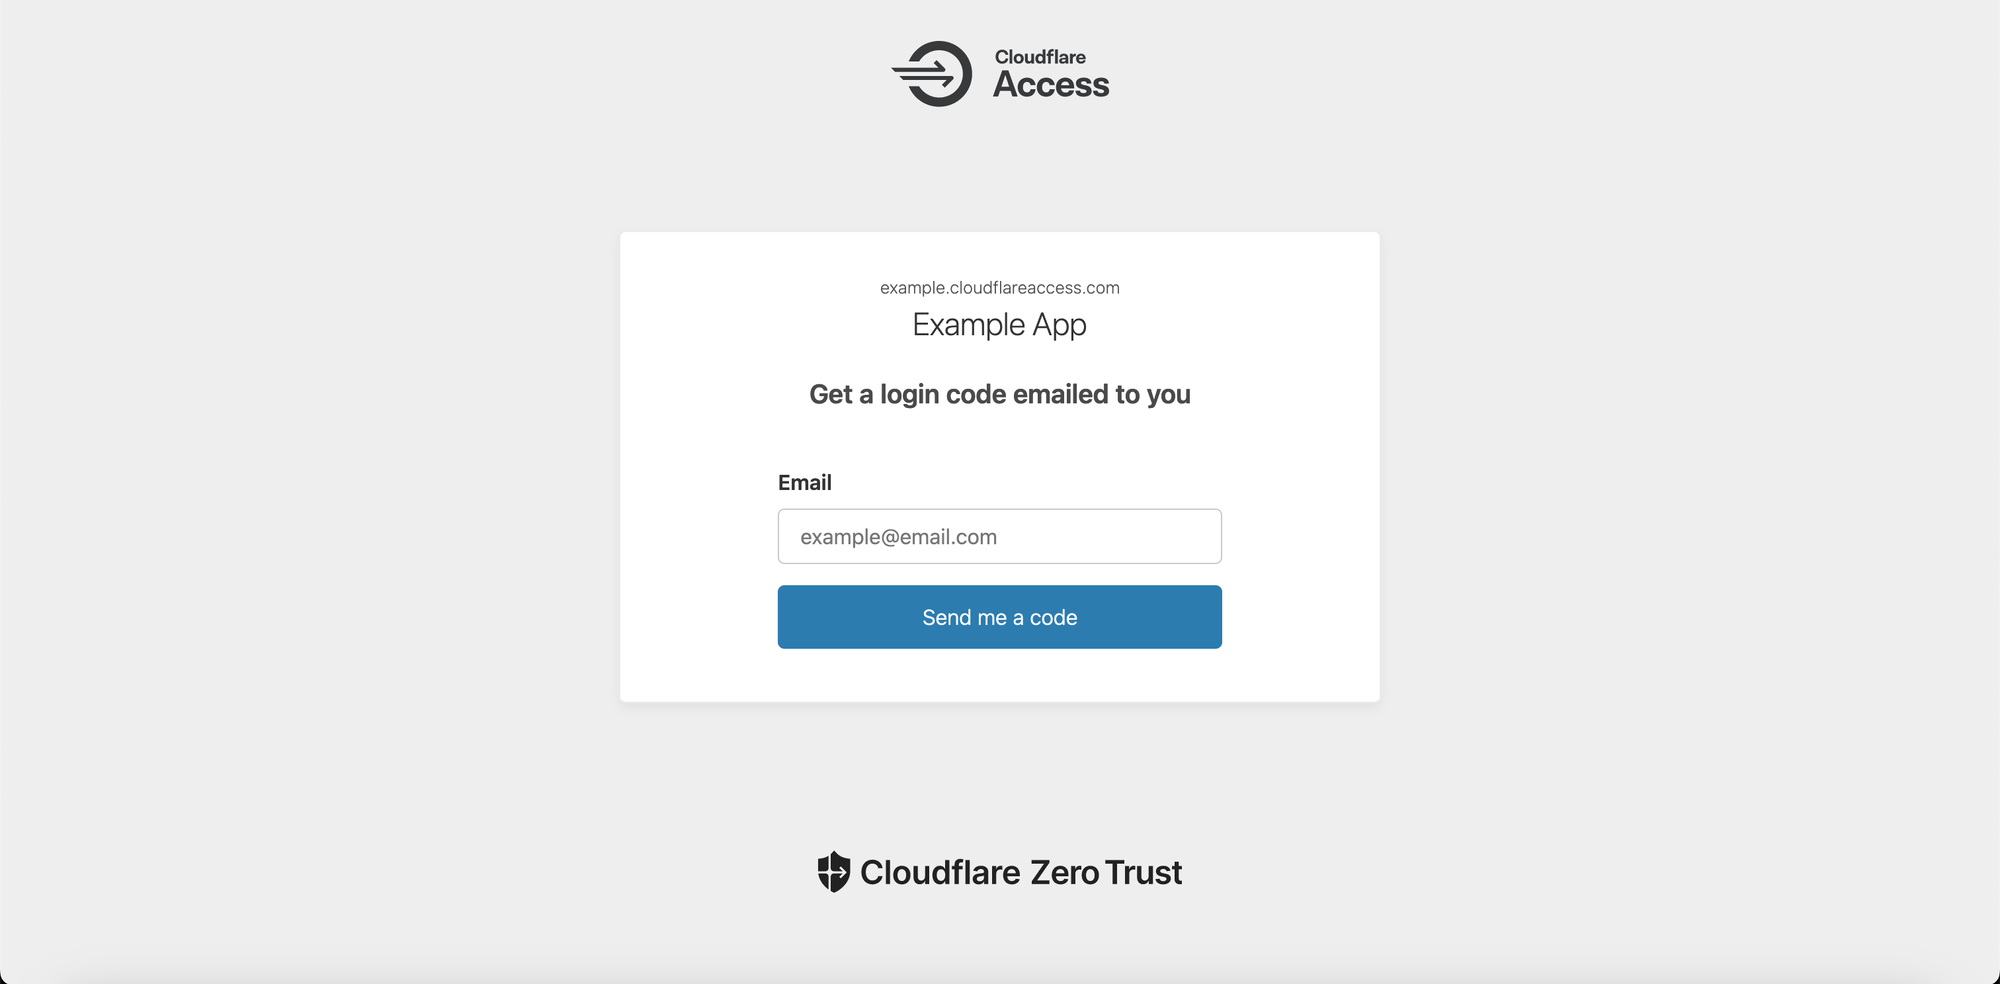
Final step: test it
Now try to access your application. You should be redirected to a cloudflareaccess.com url and see a login page.
Input the authorized email address and click on "Send me a code".
You should shortly receive an email containing a one time code, but also an URL that you can use to authenticate directly without entering the code.
Bonus: whitelist IPs and subnets
Let's say you need to perform some API calls on a URL protected by Cloudflare Zero Trust, the easiest way is to bypass the authentication by specifying the IPs/subnet you want to allow without authentication. Of course be sure those are trusted on your side, because you don't want to introduce some unwanted opening.
I like creating a group of servers/subnet I want to allow, so I can apply the same group to different applications/set of protected URL if needed.
Under "Access Groups", create a new group. Include "IP ranges". If it's a single ipv4, you don't need to specify the CIDR as it will automatically add /32 .
For a subnet, simply add your subnet following by the CIDR: 11.22.33.44/24 for example.
Then create a new policy in your application, with Bypass as action, and assign the group you previously created.
If you server use ipv6, don't forget to add it as it most probably communicate with Cloudflare through ipv6 and not ipv4.
Conclusion
That's it! An easy and more secure way to protect an entire website or a specific page, and ditch my basic auth.
Note that Cloudflare Zero Trust solution goes far beyond than just securing a DNS domain or specific URL. You can find more informations here.
You can also find the pricing here.